Normal PC

Learn how to install blendOS on your computer through this guide!
What you'll need
- A 64-bit CPU, from no earlier than 2009.
- A minimum of 4 GBs of RAM and 25 GBs of storage.
- A spare USB drive, with a minimum size of 4GBs.
- A network connection, for the installer
Installation
You can skip to a particular step from the outline on the right, if you're on a computer.
If you're on windows and would like to dualboot, read the opening section of Appendix B first.
For manual partitioning/dualbooting refer to the appendicies (the swap instructions are in appendix A).
Step 1: Download the latest blendOS ISO file
Warning for Mac users:
If you're using an Apple Silicon-based Mac, sadly blendOS doesn't support your Mac yet. Stay tuned for updates though!
If you're using an Intel Mac from 2018 or later, or a 2017 iMac Pro, you MUST follow the guide for Macs with T2 chips.
If you're using an Intel Mac not from that era, you can just follow this guide (but be aware some drivers may be missing and your experience may not be that great).
If you're coming from Windows or macOS, it's recommended that you download the KDE Plasma edition of blendOS. It is extremely intuitive, and has a similar workflow to other operating systems.
Mirror List:
If you have a 2017 iMac Pro or an Intel mac from 2018 and later, please download the latest T2 build here.
Again, Apple Silicon Macs are not supported.
Warning about downloads:
The links below are the only certified places to get the ISO, do NOT download it from anywhere else!
Warning about torrents:
FOSSTorrents is the only certified provider of blendOS torrents, do not torrent blendOS from anywhere else, and once again, do NOT use any non-FOSSTorrents torrents. If someone says they're mirroring the FOSSTorrents torrent, get the torrent from FOSSTorrents directly.
Once you've downloaded the ISO, scroll up to the top and read the installation guide!
Mirror status page: https://status.blendos.co
Bear in mind that the GNOME and KDE Plasma editions are the only ones that support Android apps.
DO NOT USE DEEPIN!
Deepin on Arch is currently quite broken, we recommend against using it.
- GNOME edition:
- KDE Plasma edition:
- Cinnamon edition:
- XFCE edition:
- LXQt edition:
- MATE edition:
- Deepin edition:
BitTorrent:
If you'd like an older build, there are 2 release archives available:
If the shinken network mirrors don't work, or you'd like to download in bulk (slowly), you can visit blend.asterisk.lol and login with credentials: U: dl P: blend
Step 2: Download balenaEtcher or dd
DO NOT USE RUFUS!
Rufus appears not to work very well with blendOS, and we won't be able to offer any support outside of "use balenaEtcher or dd" if you do use Rufus.
Ventoy should work.
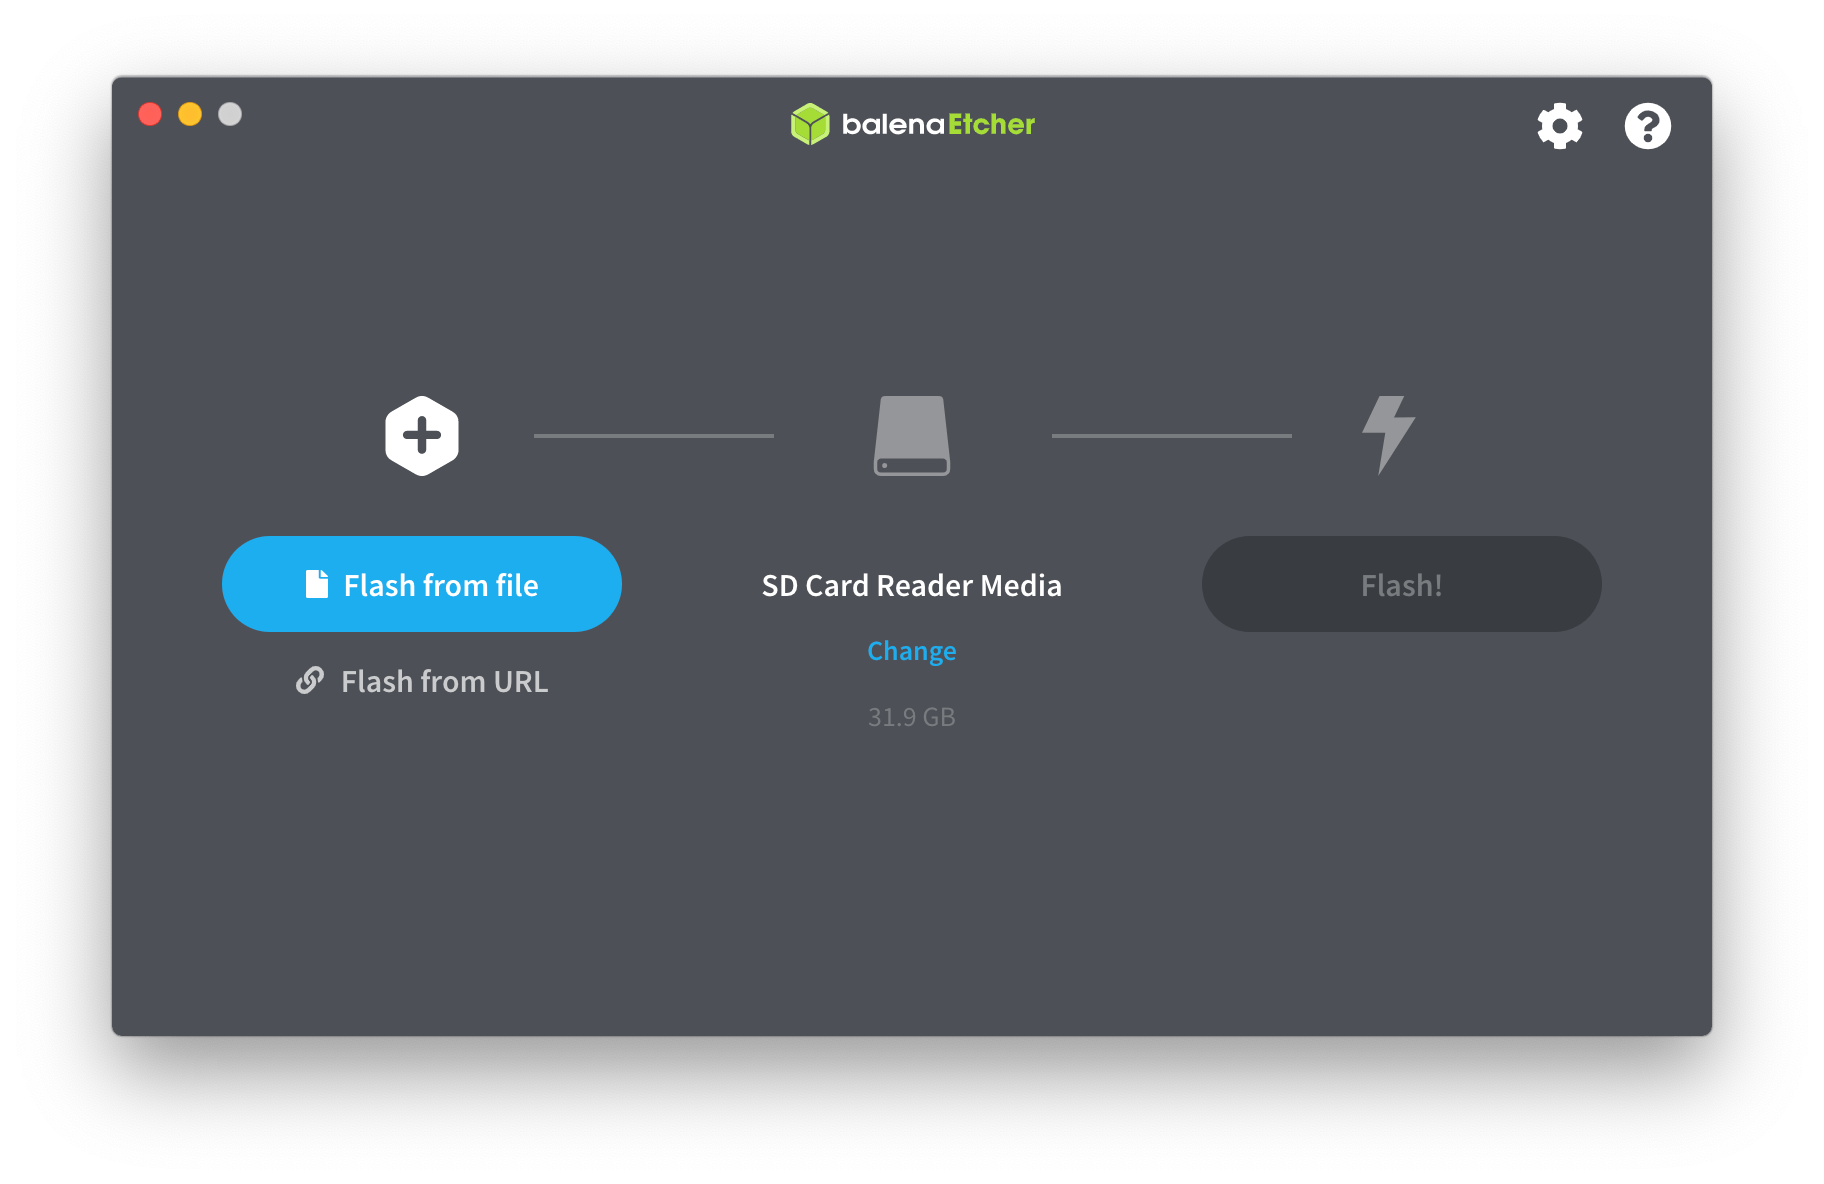
In this guide, we will be using balenaEtcher to burn the ISO file to the USB drive.
Regardless of whether you're currently using Linux, macOS or Windows, you can download and install balenaEtcher from here.
If you plan on using dd, install it through your system's package manager, it's preinstalled in most distros.
Step 3: Burn the ISO to your USB drive
Make sure to select the correct USB drive, as balenaEtcher will erase ALL THE FILES on the drive.
These buttons require balenaEtcher to be installed and are untested. They only work on Windows and MacOS (or with the AUR etcher or any etcher that when installed, registers the etcher:// URL handler) and do not work with the portable edition.
Button to flash (KDE):

Button to flash (GNOME):
Button to flash (Cinnamon):
Button to flash (XFCE):
Button to flash (LXQt):
Button to flash (MATE):
Button to flash (Deepin):
Click on Flash from file, and select the ISO file you downloaded earlier. You can then select the USB drive you would like to flash the ISO drive to. After selecting the drive, you can click on Flash to flash/burn the ISO to the USB drive.
Flashing with dd (Linux)
run lsblk to see all your disks and find the logical name of your drive and the assosciated /dev/sdX identifier.
Open a terminal and run (replacing /dev/sdX with the drive path of your USB):
sudo dd if="path_to_blendos.iso" of="/dev/sdX" bs=4M status=progress
The computer you used to flash the ISO file to the USB drive may be the same as the computer you want to install blendOS.
Step 4-ish: Disabling Secure Boot (do this first)
This section will be removed if blendOS ever supports secure boot in the future.
Enter your BIOS setup (varies by manufacturer, google <manufacturer> BIOS setup key, spam or hold that key when you see the bootlogo to enter setup)
Now, find a section called Secure Boot (or if it doesn't exist, look under Boot). Turn Secure Boot (also called UEFI Secure Boot) off (should be a simple toggle)
What did I just turn off?
Secure Boot is a system implemented by Microsoft which makes it so your computer can only boot signed EFI files.
The ones in blendOS (or any Linux distro besides Ubuntu and Fedora) are not signed (they're not Windows), so you must turn this off in order to proceed.
Step 4: Boot from the USB drive
Insert the USB drive into the computer that you wish to install blendOS to, and power it off. After a few seconds, power it on and hold (or spam) the F12 until you arrive at your computer's boot menu. If that doesn't work, you may also try F10, Esc, or F2.
Once at the boot menu, select the USB drive you flashed blendOS to. You will be greeted by another menu, where you can press Enter to proceed with booting the live installation media.
The menu didn't load and my PC says something about a Secure Boot violation!
Make sure you do step 4-ish even if it just shows a black screen or boots into a diagnostic menu.
Step 5: Opening the Installer
You may see some flashing text come up during boot, it's normal! (Just a Linux thing)
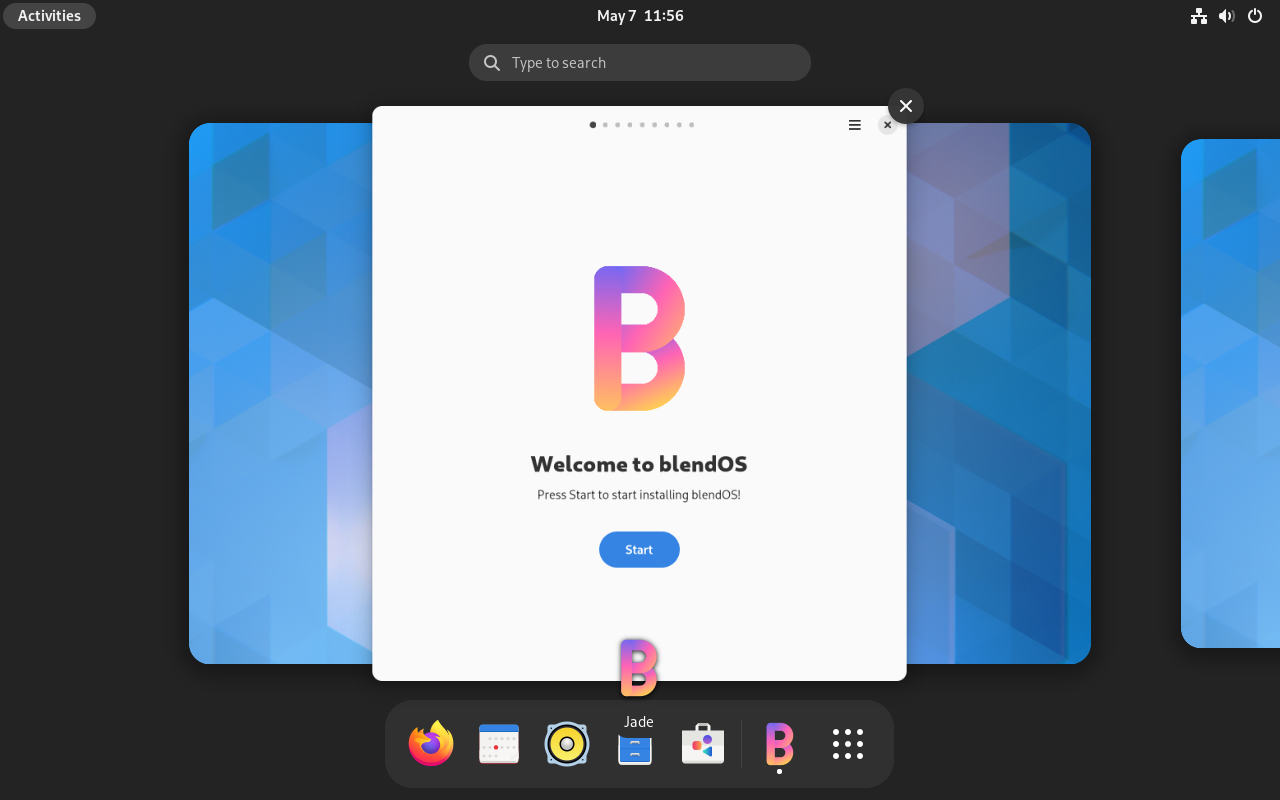
You should arrive at the desktop, which should look like this:
GNOME:
KDE:
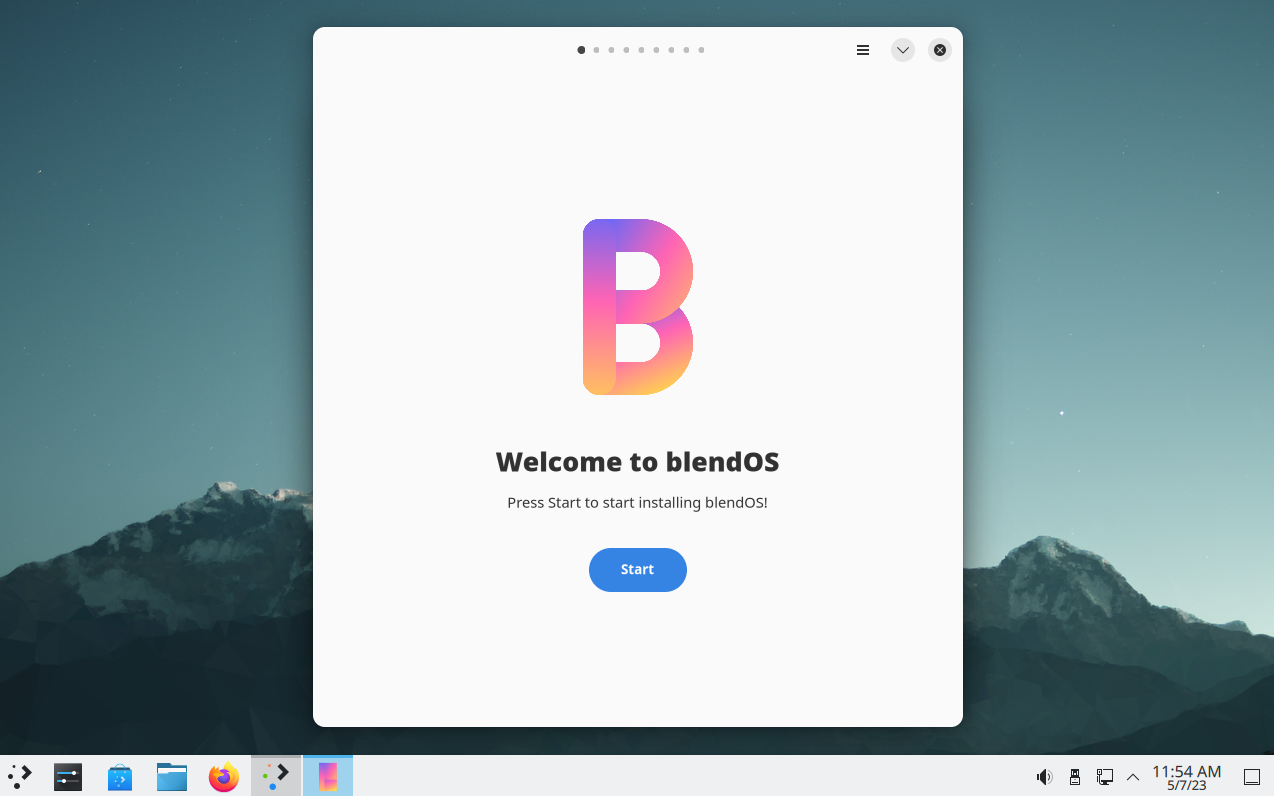
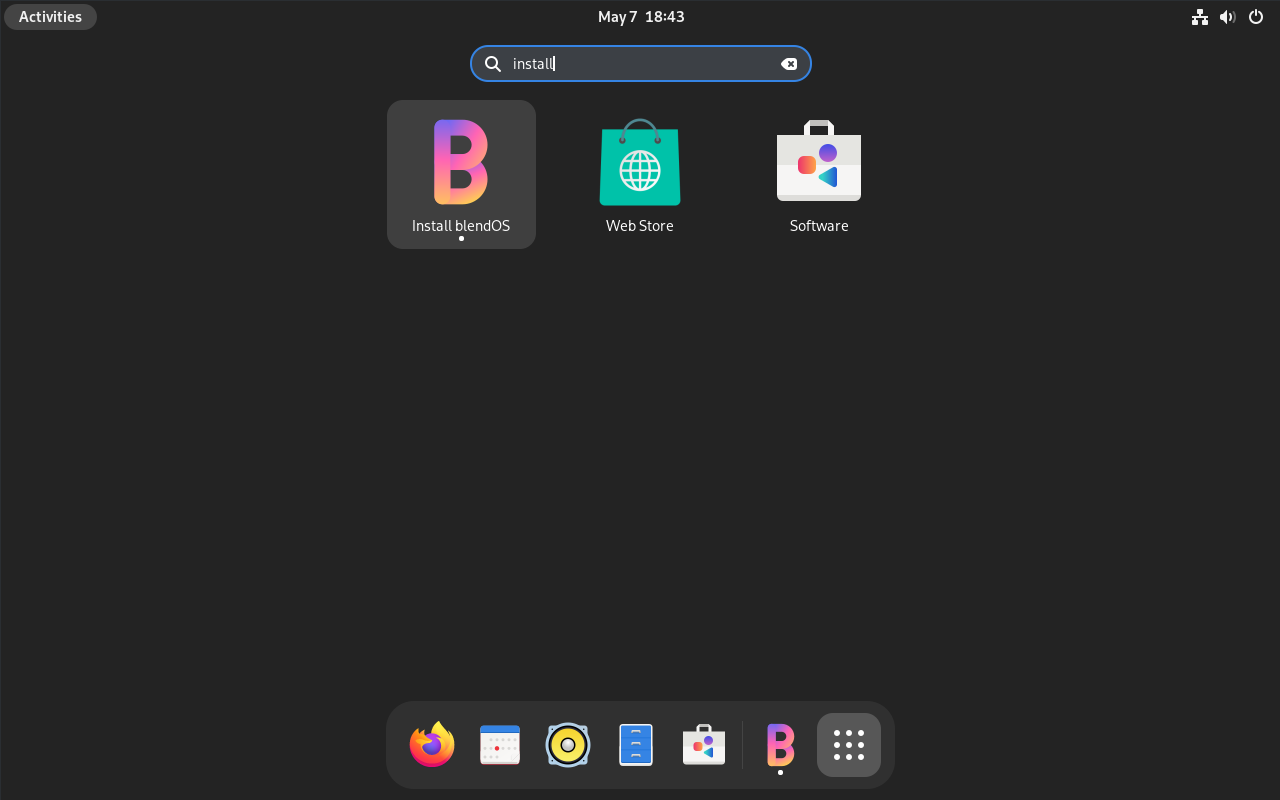
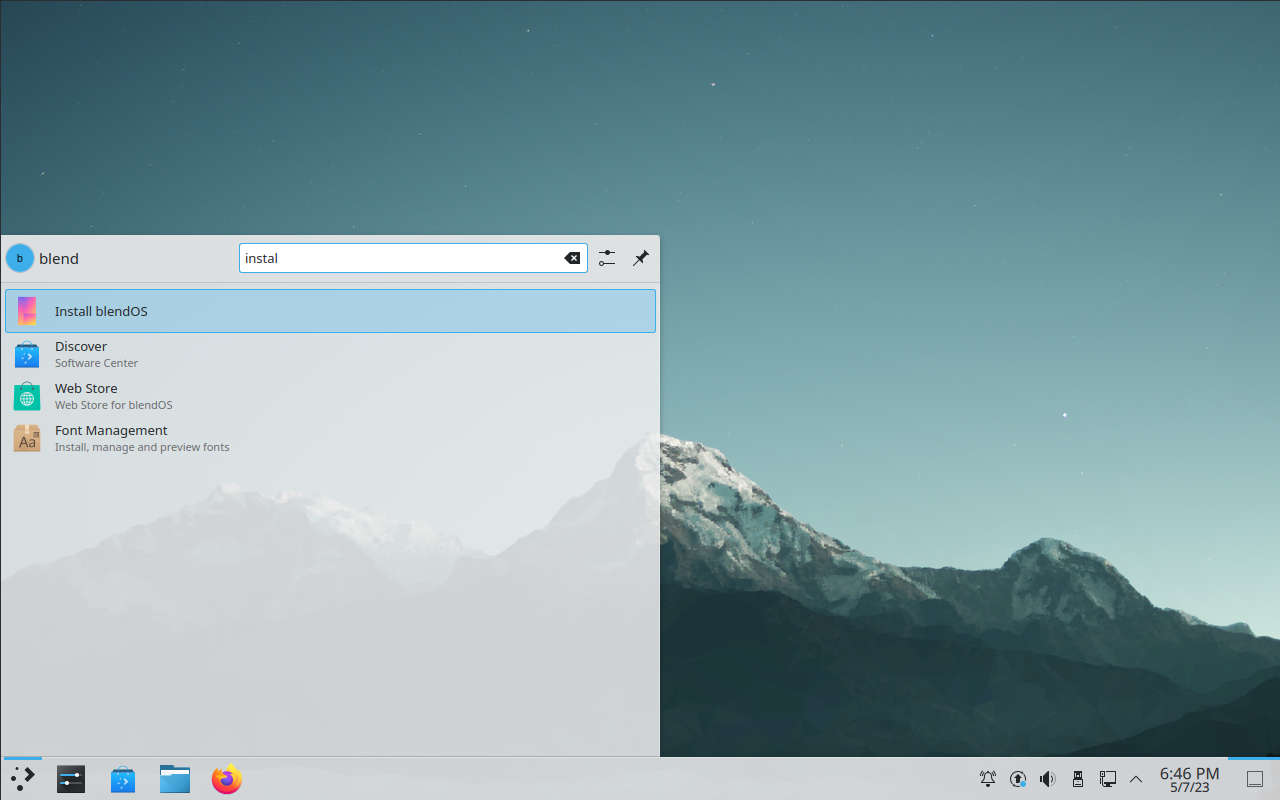
The blendOS Installer should pop up. If it doesn't, open it from the Application Menu (press the Windows key) and type "installer":
Step 6: Running the installer
Before you run the installer, make sure you are connected to the internet.
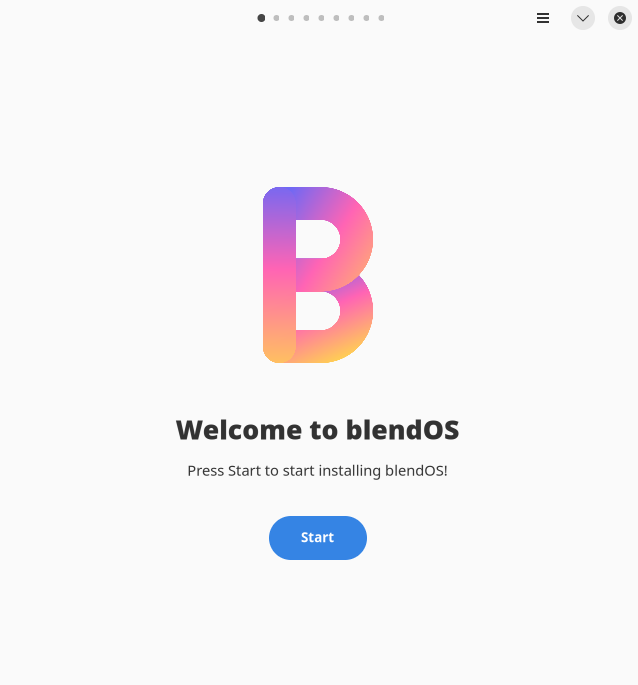
Click Start in the installer to begin the install process.
1. You'll first be asked to select a keyboard layout:
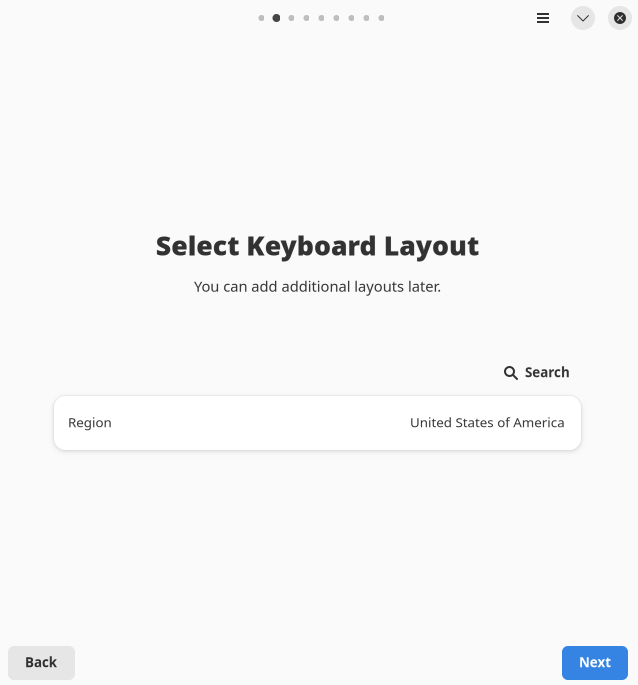
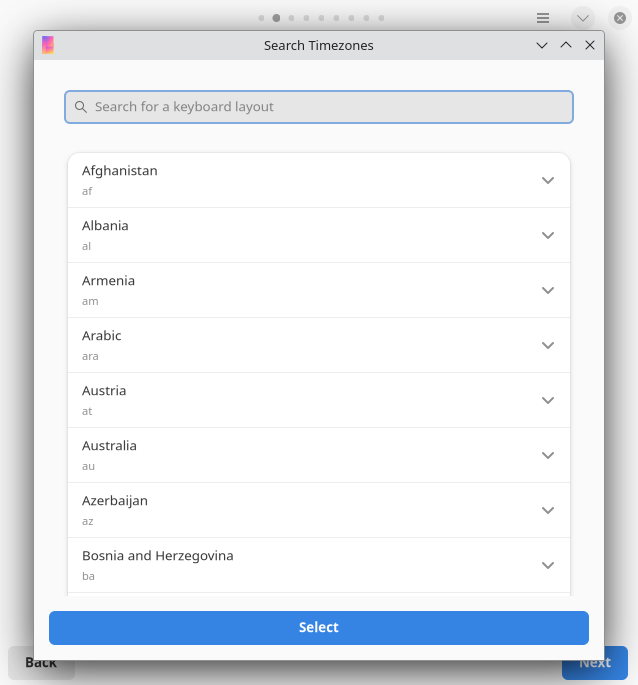
Click Search to choose a keyboard layout (even though it says timezone):
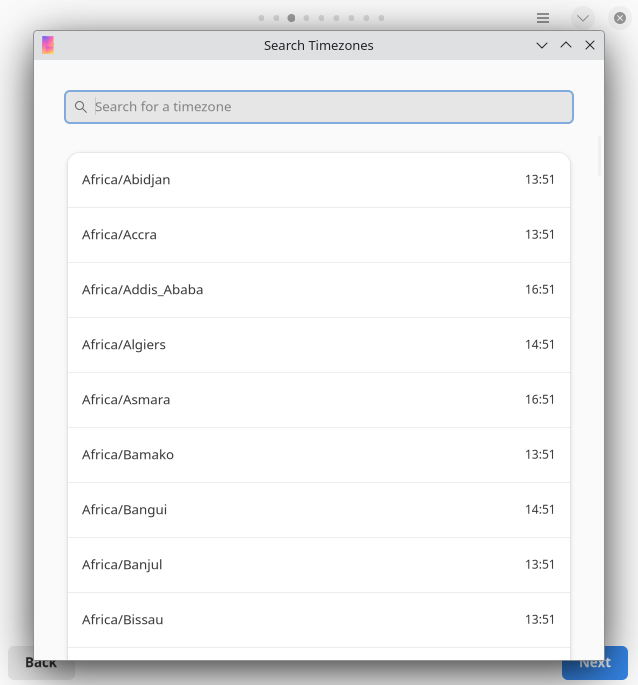
2. After choosing your keyboard layout, select your timezone:
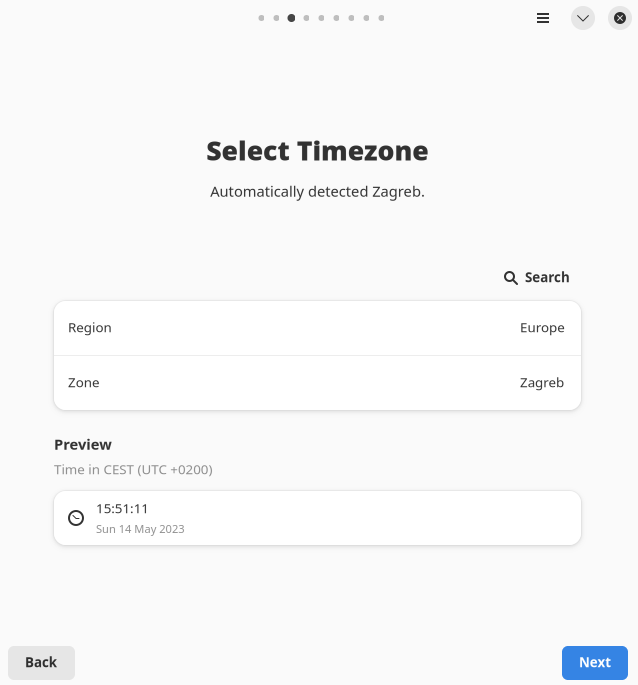
Hit Search to see timezone options:
3. After you set your region, it's time to set your locale:
What is a locale?
A locale is basically the thing that the system checks to set your currency, time/date layout (dd/mm/yyyy or mm/dd/yyyy) and language.
It also sets your text encoding.
They're typed like this: <lang>_<country_code>.<text_encoding> (ex. en_US.UTF8)
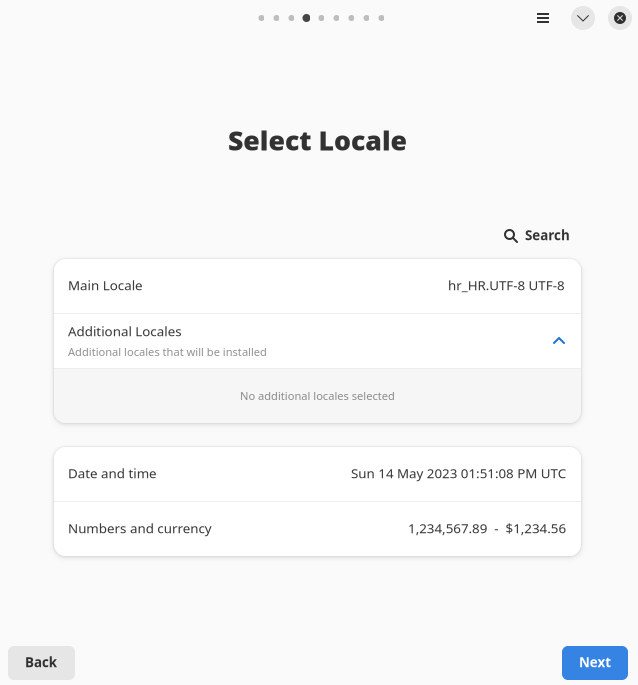
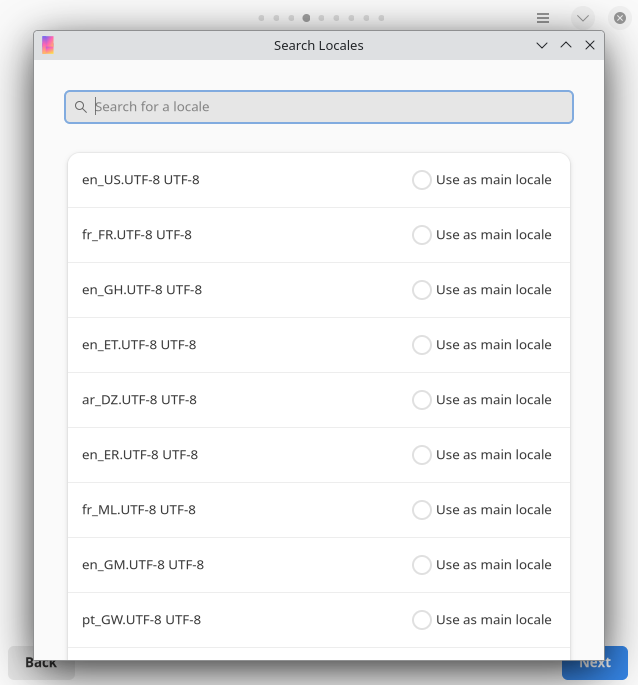
Hit Search, then choose a locale, and tick Use as main locale (the circle) then double click the locale name or else install will not proceed:
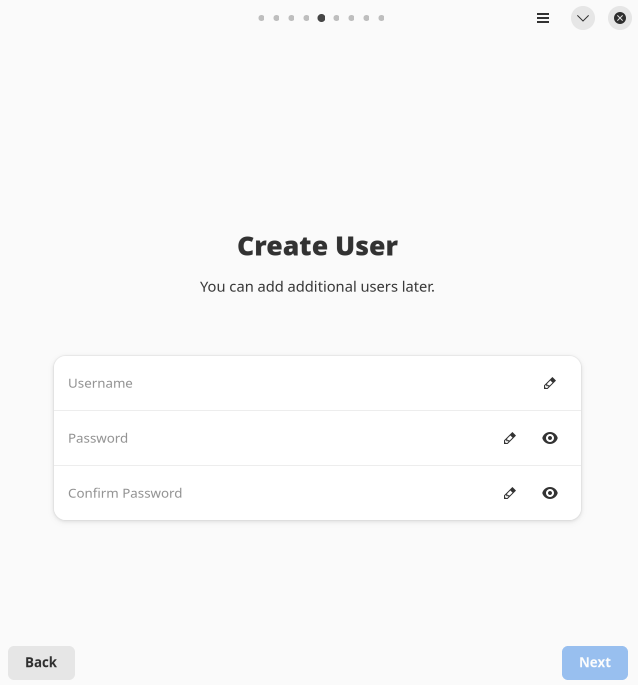
4. Make your user account:
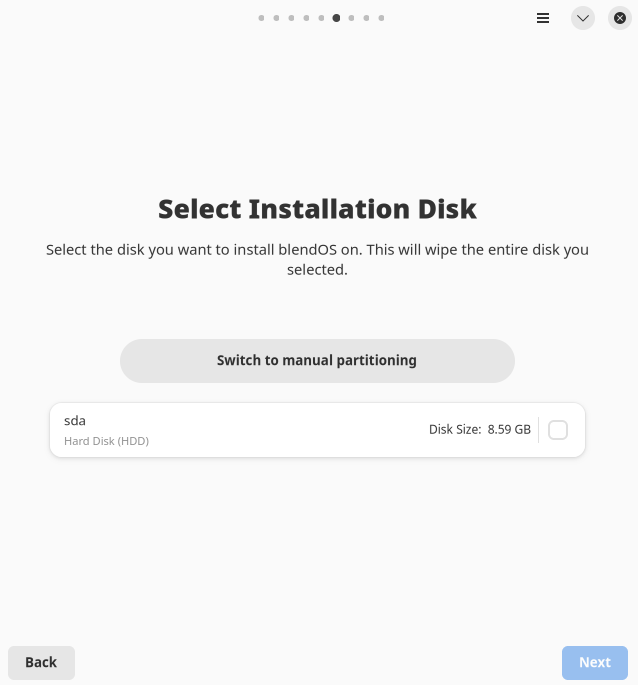
5. Next, choose the disk you'd like to wipe and partition, or choose Manual Partitioning:
WARNING!
This will erase all data on the selected disk.
Manual Partitioning (consult Appendix A or B for how to do this):

6. Then, check that everything is good in the Summary:
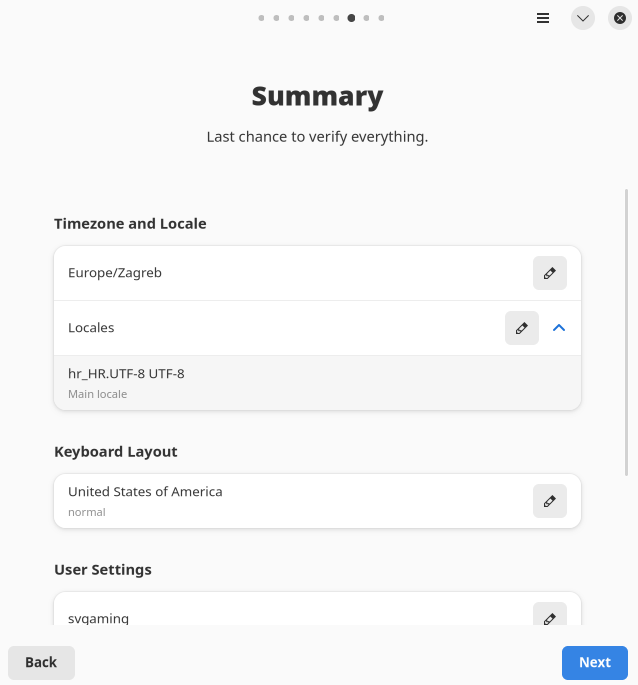
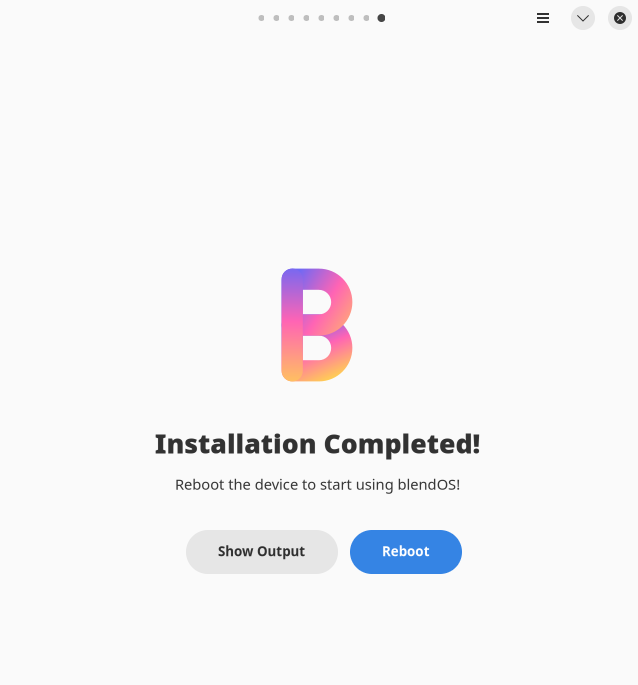
Then, hit Next and wait for the installer to finish:
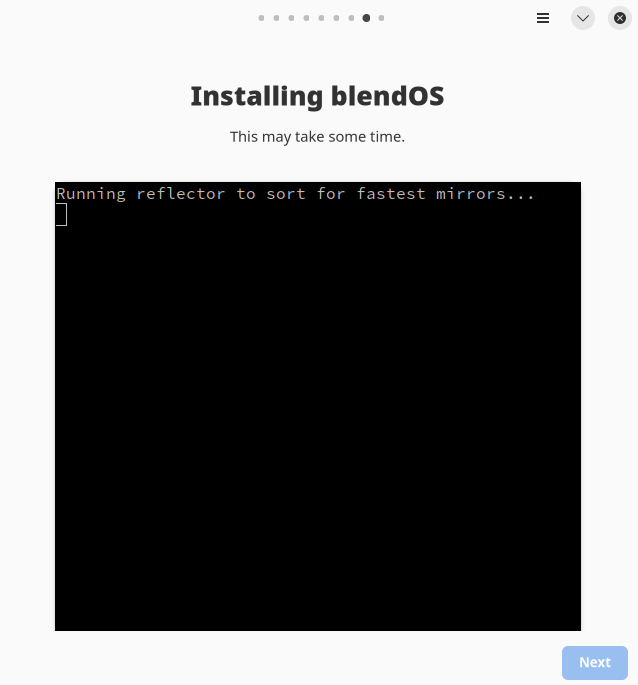
Once the installer finishes, you'll be greeted with an option to reboot:
Post-Install
Step 1: Containers
Start reading the Container management guide and make your first container!
Appendicies
Appendix A: Manual Partitioning (UEFI)
How to manually partition on a UEFI system:
If you are using VirtualBox or VMWare (or any legacy BIOS system/hypervisor) this guide is not for you, you're on your own.
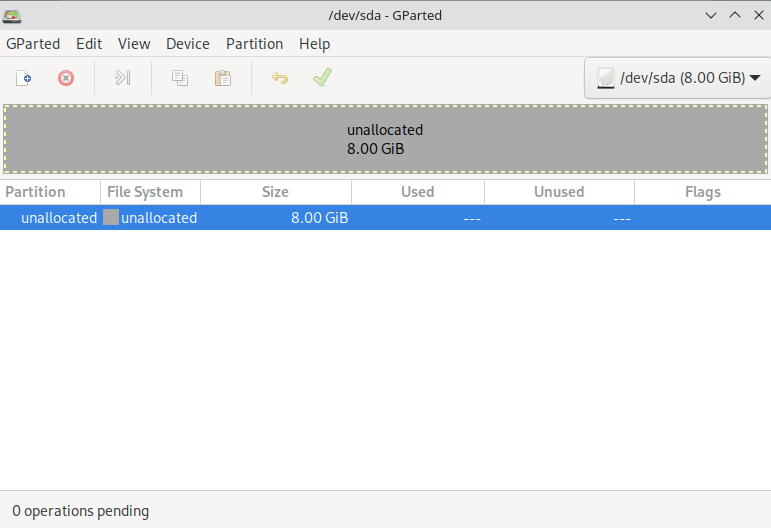
- In the installer, choose Manual Partitioning, then Open GParted:
Now you should see something like this (but with your partitions):
Choose the disk you'd like to use in the upper right.
MAKE SURE YOU CHOOSE THE RIGHT DISK!!
If you do not choose the correct disk, you may do unwanted damage.
The install livecd will also be shown here (as the last disk, usually /dev/sdb or /dev/sdc, it has an ISO partition and an EFI partition.)
Do not format the livecd.
- If you wish to wipe your drive go to
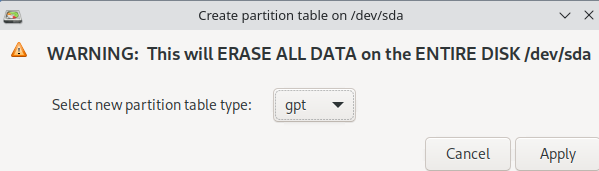
Device > Create Partition Table: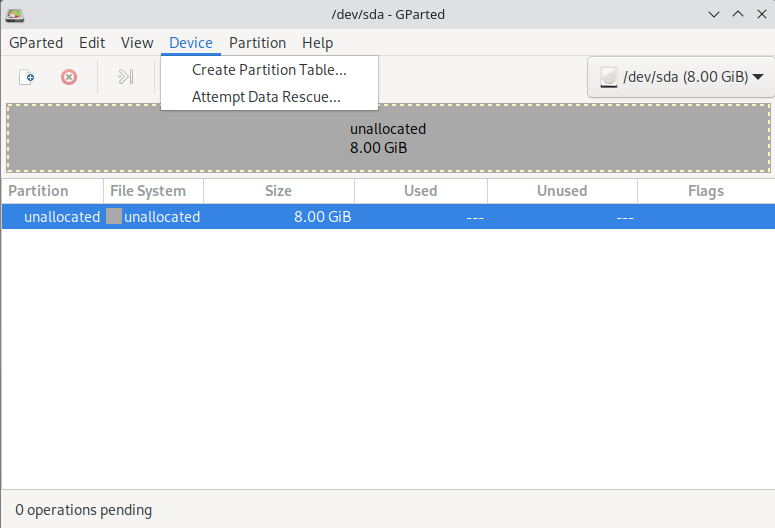
------------------ WARNING!! ---------------------
THIS WILL WIPE ALL DATA AND PARTITIONS ON YOUR DRIVE!
- For the partition table choose GPT (you do have a UEFI system, right?) (most PCs have UEFI)
- Make a new EFI partition (
Partition > Newor clicking theNewicon on the top bar):
In the box, set the New Size to 512 and drag the partition to the left side.
Set File System to fat32, Label it what you want, and hit Add.
Changes are not saved in GParted until you hit apply, so you can tweak all this to your liking.
You should now see this:
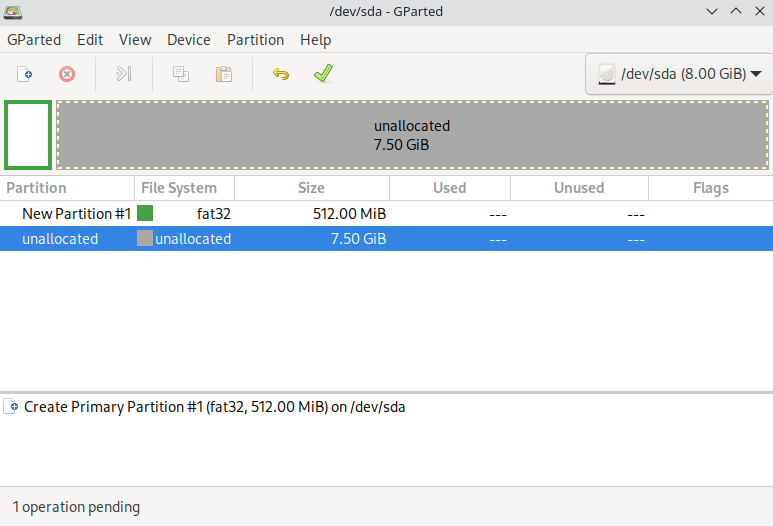
The box on the bottom shows pending changes, so you can see what you've done.
For a swap space, consult Appendix A.1.
- Make your main partition:
Make a new partition with the following settings:
- File System:
ext4 - Space: The rest of your drive (unless you want a seperate
/home,/usr, and/or/tmppartition) - Label: whatever you want
- Finalizing
Hit Apply (the green checkmark)
THIS WILL MAKE WRITE CHANGES TO YOUR DISK!!!
Make sure that eveything is good before you proceed.
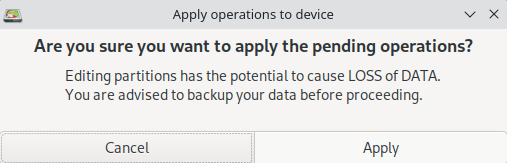
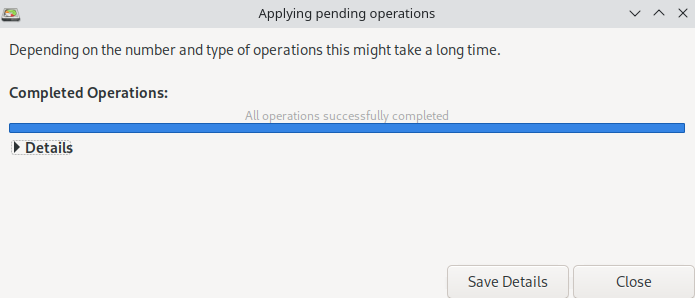
Hit Apply again to proceed and wait for the operations to complete.
Once completed, hit Close.
Now, go back to the installer (hit the refresh icon)
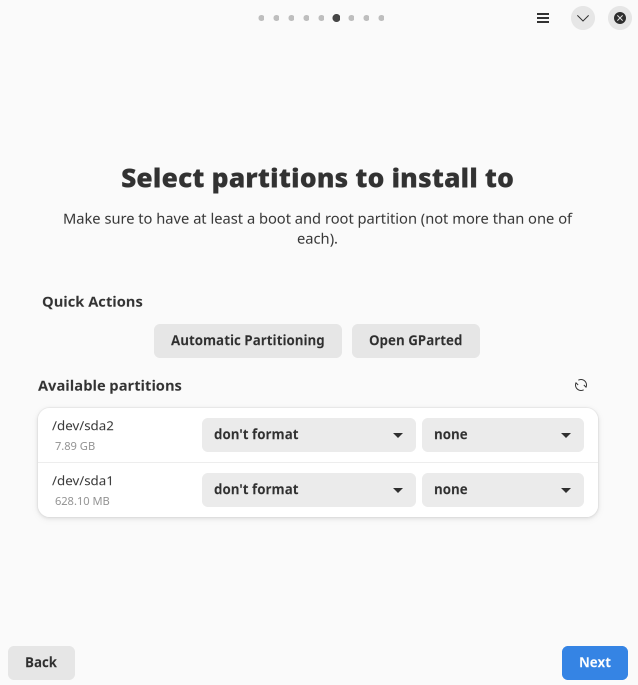
You should see your new partitions below:
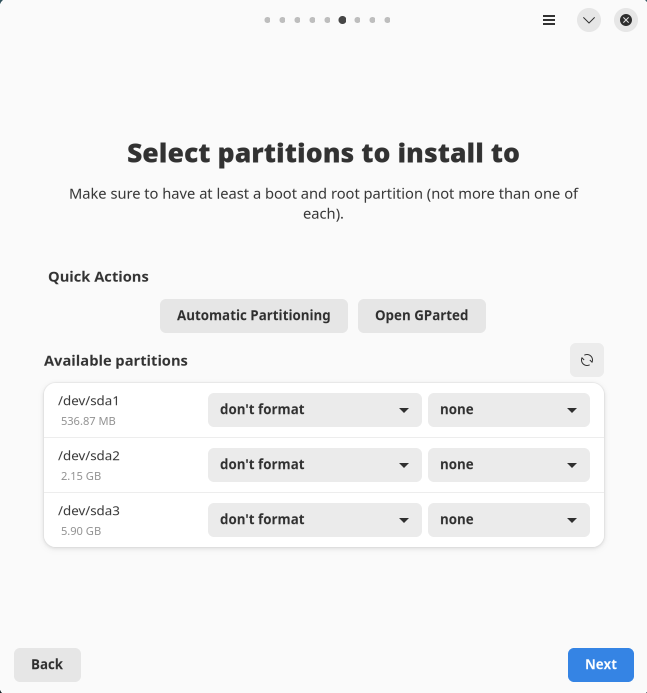
Set the following: (open the terminal and run lsblk to see disks and partitions on your system)
(You may see something different, like /dev/nvme0n1p1 for partition 1 of NVMe drive 1, but the procedure is the same)
Make sure that you pick the right disk, note down the id of the disk you used (ex. /dev/sda) (may also be /dev/sdb1, /dev/sdc1, etc, but the procedure is the same)

/dev/sda3 in the table will be /dev/sda2 for you if you didn't make a swap space.
The biggest partition should be mounted at / and not formatted (it's your /dev/sda3).
| Drive | Format? | Mount Point |
|---|---|---|
| /dev/sda1 | No | /boot/efi or Boot |
| /dev/sda2 | No | None or Do Not Use |
| /dev/sda3 | No | / or System |
If the Continue button still does not show, switch to automatic partitioning and back to manual again.
Appendix A.1: Making a swap partition
Why would I want a swap partition?
Swap is like memory but on your disk, useful if you have a low amount of RAM or do a lot of containerization / virtualization. It's also helpful to have some swap.
Also, if you're doing this post-install, you'll need to follow these instructions from the installer, just select your drive in gparted, and shrink your main partition (right click it > Resize/Move), then follow this guide on the empty space.
Making a swap partition
This is not your only option (you can also swap to a file post-install), but here's how to do it:
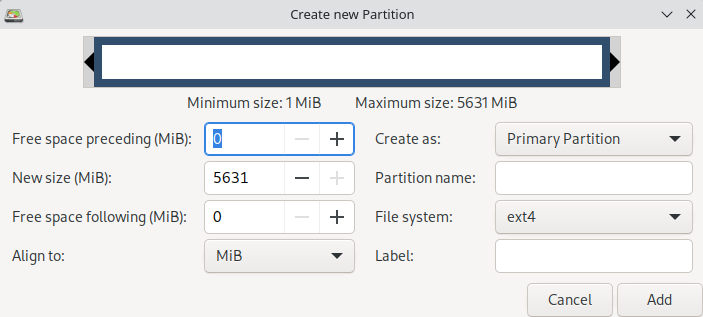
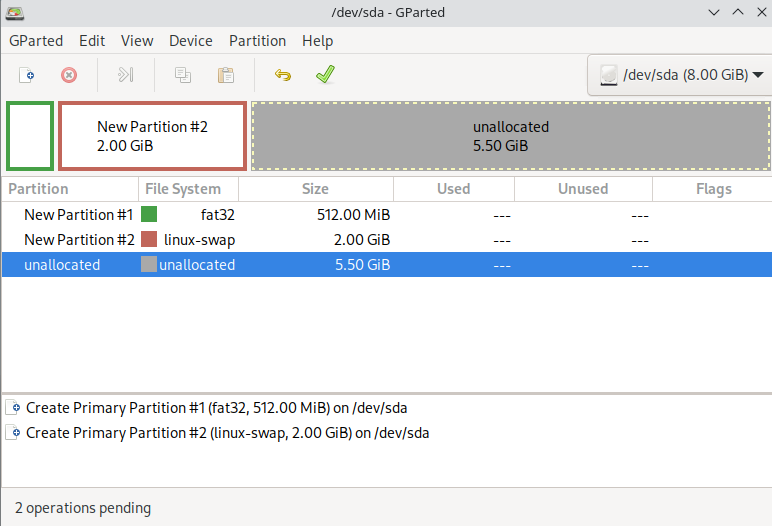
Make a new partition (Partition > New) and set it up like the image below:
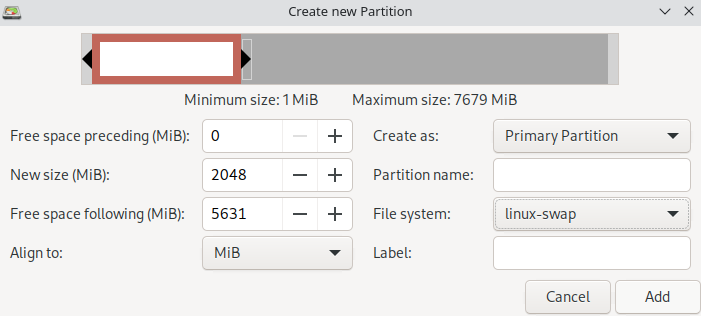
Set File System to linux-swap, size to whatever you want (1028 MB = 1 GB in this case)
If you don't know what size your swap should be, consult the table below:
| RAM Size | Swap Size (Without Hibernation) | Swap Size (With Hibernation) |
|---|---|---|
| 256MB | 256MB | 512MB |
| 512MB | 512MB | 1GB |
| 1GB | 1GB | 2GB |
| 2GB | 1GB | 3GB |
| 3GB | 2GB | 5GB |
| 4GB | 2GB | 6GB |
| 6GB | 2GB | 8GB |
| 8GB | 3GB | 11GB |
| 12GB | 3GB | 15GB |
| 16GB | 4GB | 20GB |
| 24GB | 5GB | 29GB |
| 32GB | 6GB | 38GB |
| 64GB | 8GB | 72GB |
| 128GB | 11GB | 139GB |
Table contents taken from this It's FOSS article
Label it what you want, and hit Add.
(you'll see something like this):
Appendix B: Dualbooting with Windows (UEFI)
Opening Section
Keep in mind you will want to install Windows first, for bootloader reasons.
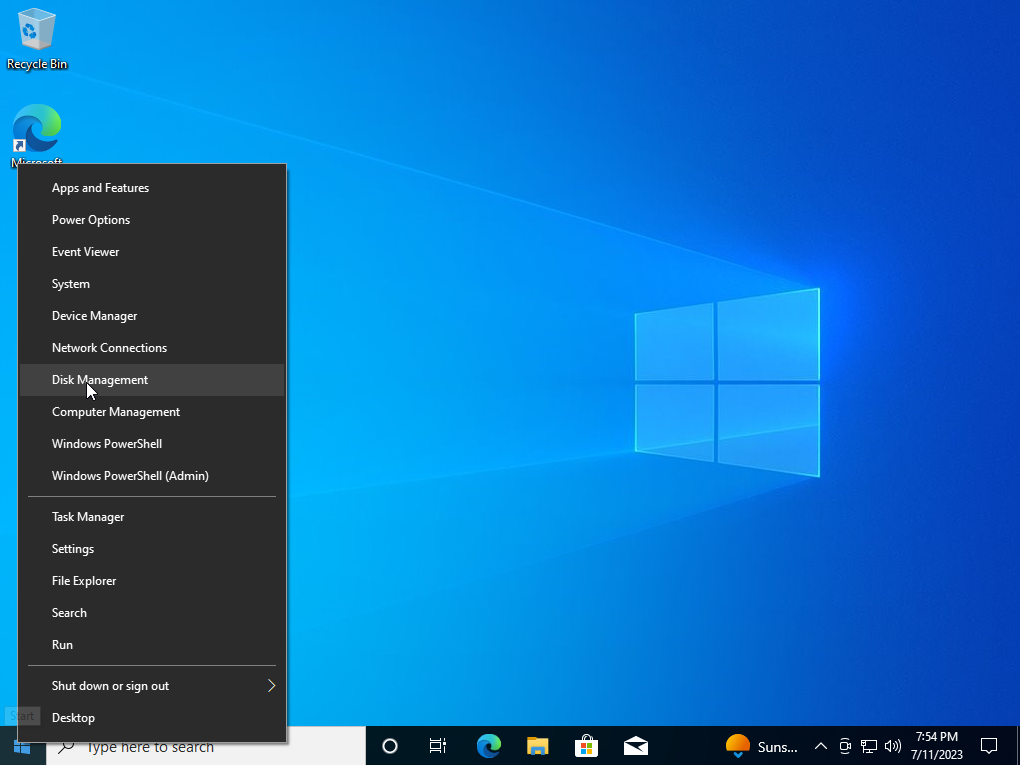
So first you need to do some math. Right click the start button (or hit Win + X) and choose Disk Management.
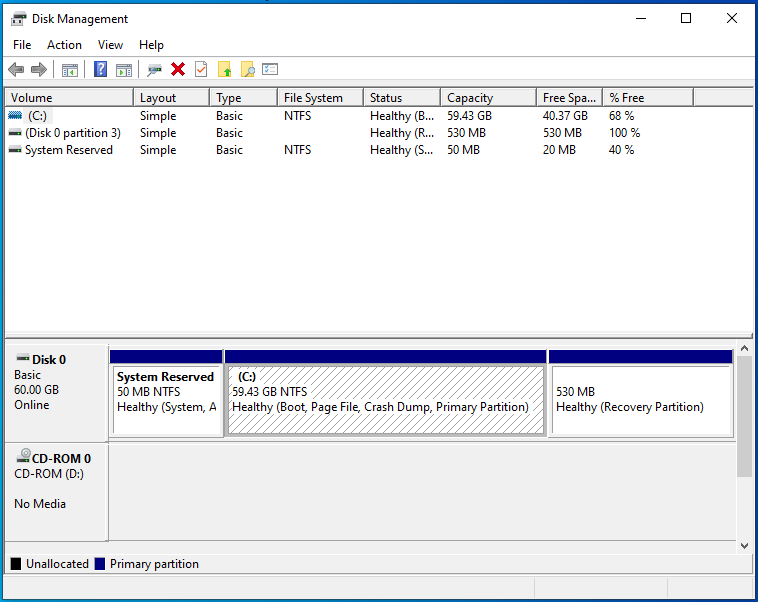
Find your C: drive.
Now see how big it is. You need to think about how much space you want to give to Linux. You could go for about half, but keep in mind Linux generally needs less space than Windows. It really comes down to which you'll use more and if you'll have more than 1 Linux partition (seperate /home partition for example).
Once you've figured that out, take your size in GB and convert it to MiB (mebibytes, 1 GB = 1024 MiB, so size in GB * 1024 = size in MiB)
Note down the resulting number.
Once you know that info, you're ready to boot into blendOS! Now follow the rest of this guide up to the partitioning section, then come back here.
The rest
Click Switch to manual partitioning, then Create partitions.
Find your windows drive (should be the first one)

Select your C: drive, it's the one NTFS partition, and the biggest partition.

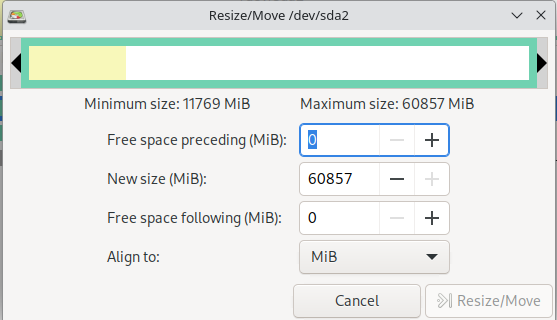
Now right click it and select Resize/Move
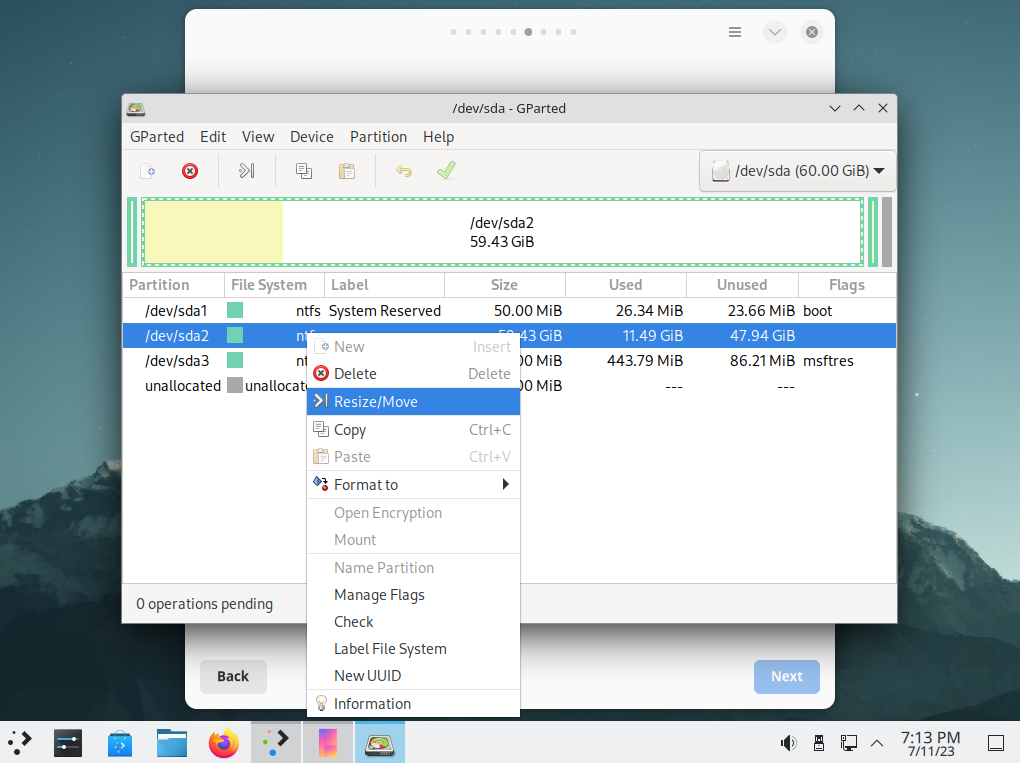
You should see a window with some settings and size stuff:
In the New Size box, put the MiB number you came up with in the opening section.
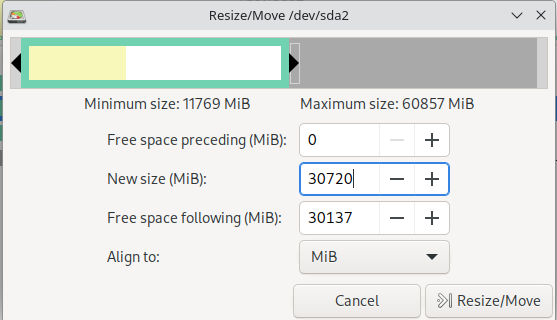
Then, click Resize/Move.
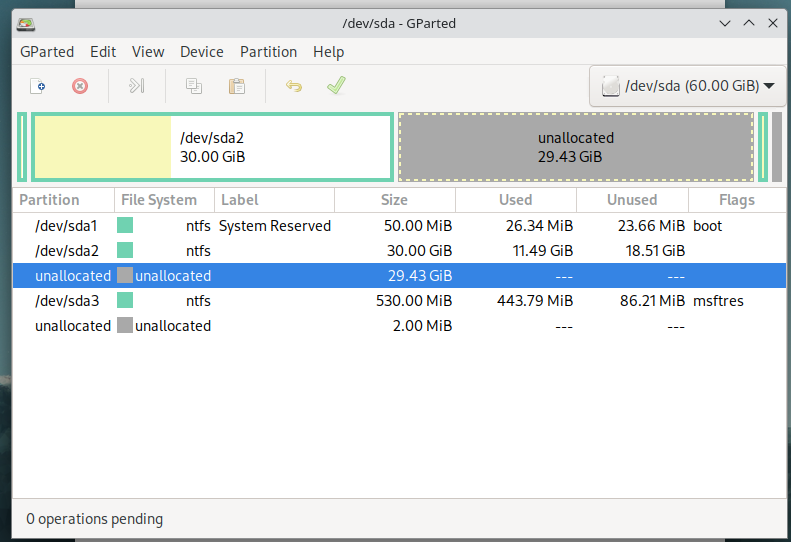
Now, you should see some empty space:
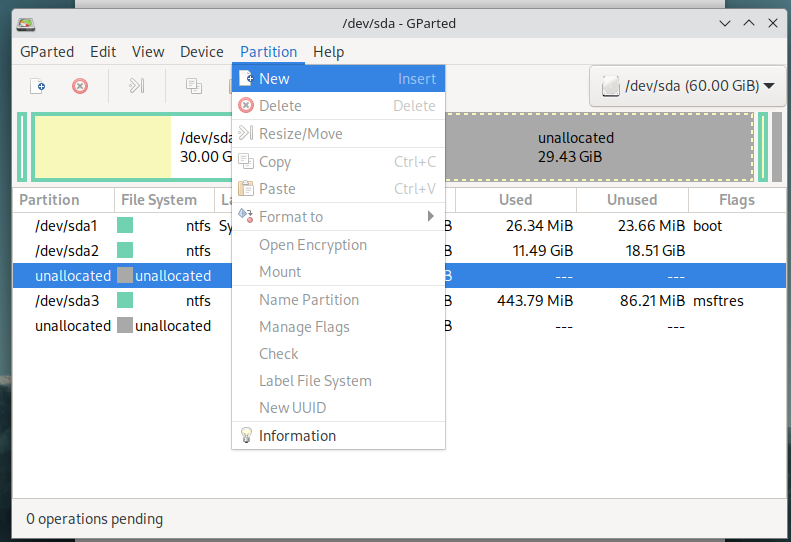
Select the unallocated space and make a new partition (Partition > New):
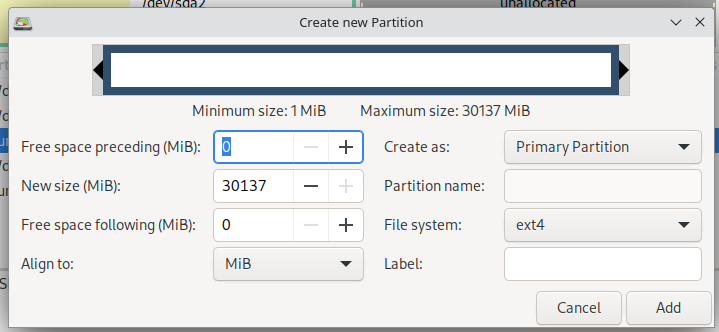
The New Size box should be automatically set to fill the empty space, if not, resize it.
Then set Filesystem to ext4 (or your filesystem of choice) and set Label and Name to whatever you want.
Click Add.
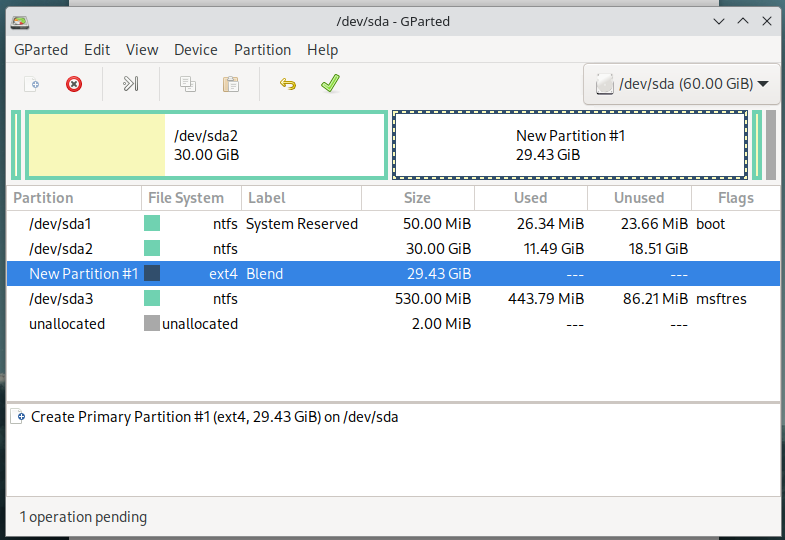
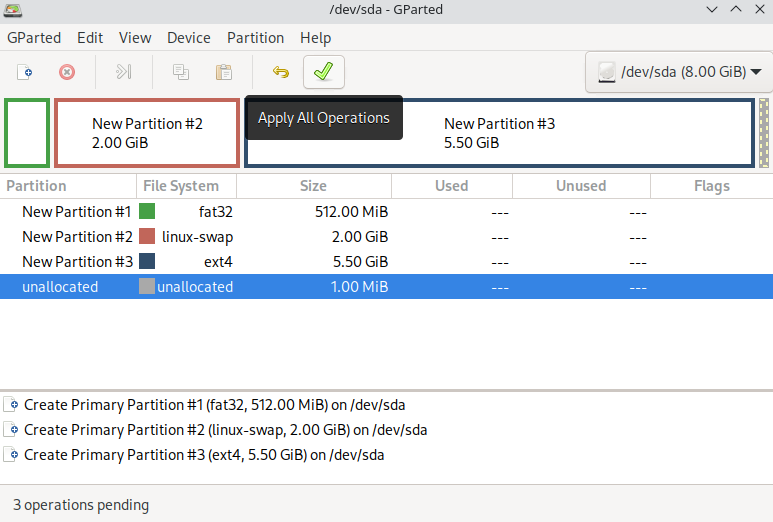
Now you should see a list of operations at the bottom.
GParted will not write anything until you hit Apply, so make sure everything is in order, then click the green checkmark.
This will not wipe your disk 😉, you're just shrinking your Windows partition and making a new partition.

Hit Apply.
Wait for all the operations to complete, then hit Close.

Now, go to the installer (hit the refresh icon next to the partition list).
You should see more partitions.
Do the following (Use GParted to ensure the partitions are correct):
| Drive | Format? | Mount Point |
|---|---|---|
| /dev/sda1 (your EFI partition) | No | /boot/efi or Boot |
| /dev/sda5 (your ext4 partiton you made) | No | / or System |

The next button won't show!
Switch to automatic partitioning, then back to manual, it's a weird installer bug.
Hit Next.
Once the system installs, reboot.
Once you're in your newly installed blendOS, open your terminal and run the following:
sudo system install refind imagemagick sbsigntools
After this, do what system says and reboot.
Once you're back (again), run sudo refind-install in your terminal.
Now, rEFInd (alternate bootloader that can detect your Windows install) is installed!
Now, when you boot, rEFInd should come up instead of GRUB. If not, fix this in your UEFI settings.
From rEFInd you can load GRUB, Windows, or directly boot blendOS.
Kudos to Morgan Weedman for showing us rEFInd does work on blendOS.